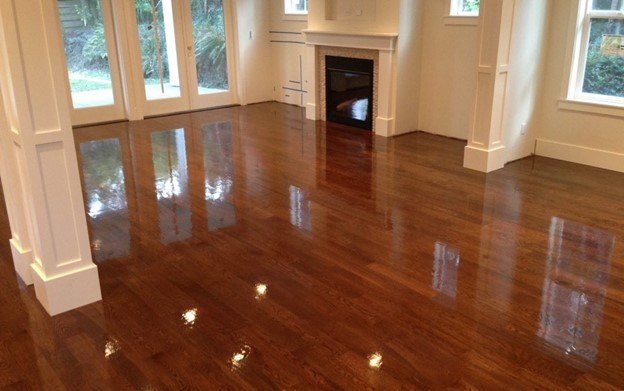
Hardwood floors are the perfect way to create a home that feels comfortable and inviting. With so many options for hardwood flooring in Alpharetta, it’s easy to find the look that matches your style and budget. Hardwood floors last for years and make an excellent investment for your home.
Not only are hardwood floors beautiful, but they can be used to create different looks such as causing a stained finish to achieve a traditional or contemporary hardwood finish or a more distressed look for a rustic finish. Hardwood flooring adds warmth to any home and comes in various colors and styles to suit your style!
Refinishing Hardwood Flooring
Refinishing hardwood floors is a great way to update the look of your home without having to replace your flooring. There are lots of ways you can refinish your hardwood floors. The first thing you need to do is determine what type of finish you want for your floor. There are many types of finishes, including polyurethane, lacquer, and oil-based. You will also need to decide if you want a clear or an opaque finish on the floor. Clear finishes will show scratches and other imperfections on the wood, while opaque finishes will hide these imperfections.
Refinish Wood Floors With A Solid-Color Stain or With A Transparent Sealer?
There are many different hardwood floor finishes to choose from, and the type of finish you choose for your space will depend on your needs and the look you’re aiming to achieve.
The first thing to consider is whether you want a transparent or colored finish. If you want a clear finish, then a few different options are available. You can use oil-based polyurethane, water-based polyurethane, or an acrylic urethane tinted with pigment. If you want a colored finish, then there are also many options available. You can use dyes mixed with oil-based polyurethane or water-based polyurethane, dyes mixed with an acrylic urethane that has been tinted with pigment, or stains mixed with oil-based polyurethane.
The above dyes can be used to tint water-soluble or oil-soluble polyurethane or acrylic urethane, respectively. A difficulty when using a stain is the need to mix two different types of dyes. For example, to use a dye mixed with at least 20% of a resin solution, the paint must be mixed with at least 20% of the solvent. However, this can be difficult to accomplish because dyes are generally insoluble in most solvents and polymers.You can watch youtube videos and tutorials to learn tips and tricks to achieve these
Solid color stains are significant for those who want a more natural look. They give the wood a deep, rich color, making it feel like hardwood. However, they don’t protect the wood from spills and scratches as transparent sealers do.
Transparent sealers protect the wood from spills and scratch better than solid color stains. They also give the wood a nice sheen that makes it look more polished and professional. But they don’t provide as much protection against spills or scratches as solid color stains do.
What You Should Know Before You Start The Process
The process of refinishing hardwood floors can be a daunting task for homeowners. If you feel it is not meant for you, you can walk into a hardwood flooring store in Alpharetta and select from the wide range of available flooring.
There are many things to keep in mind, and the process is not very straightforward. In this article, we will go over some of the steps you should take before you start the process. We will also give you some pointers on ensuring that your floor looks great when it is done. It would be best if you always prepared your floor before sanding its hardwood floors. This includes removing furniture and carpets from the room and covering any objects that might be harmed by sanding dust, like paintings or vases, with plastic wrap. Some of the steps included are:
- Remove any furniture or carpets in the room so they won’t wreck anything while sanding and their dirt won’t ruin the wood if you ever decide to recover them later. If you have a rug, cover it with plastic wrap, so it doesn’t get dirty.
- Put on a dust mask, goggles, and earplugs.
- Sanding will cause a lot of dust to fly into the air, so make sure you wear a decent mask, goggles, and earplugs to protect your lungs and ears from all the debris! And please consider wearing an old t-shirt or something that would get covered in dust as well
How To Choose Solid-Color Stain vs Clear Sealer for Hardwood Floors
You may notice scratches on your flooring, these need to be taken care of before you start the next steps. The first step is to use a mixture of water and vinegar on the scratch. This will dissolve the oils that are causing the scratch. The second step is to use medium grit sandpaper on the scratch. This will remove any traces of residue left behind from the first step. The third step is to use a dry cloth or towel and wipe off any excess liquid left behind from the previous steps.
How To Prepare Your wood Floors For Refinishing
If you have a wood floor that needs refinishing, you should prepare it for the process with these tips:
– Sand the floor with medium grit sandpaper to remove loose finishes or dirt.
– Clean the floor with a damp mop, then let it dry completely.
– Apply a coat of Primer and let it dry completely.
– Apply two coats of sealer and let them dry completely before walking on them.
– Apply a coat of paint and let it dry completely.

Details on How To Refinish Hardwood Floors
Here we have explained the process of finishing hardwood flooring in detail:
Step 1) After you have decided on the first step of choosing if you want a clear or an opaque finish on the wood, you can begin the process. Clear finishes will show scratches and other imperfections in the wood, while opaque finishes will hide these imperfections.
Step 2) You will need to prepare your wood surface before you paint it properly. You should sand, stain, and wipe it down with mineral oil. Using a clear finish, you should seal the wood with a polyurethane sealer. If you are using an opaque finish, let the wood naturally “finish.”
Step 3) Prepare Paint Surface and Roller: This step is optional but recommended. You should use a clean rag to dampen the paint surface to create a smoother surface for your roller.
Step 4) Apply Primer to the wood If a primer is not recommended for your wood, skip this step. This step should only be used if you are using a primer on the wood. Apply several thin coats of primer to the entire surface, ensuring that each coat is well-sealed with a clean cloth between coats. The last coat should overlap the first for a uniform finish.
Step 5) Apply High-build Primer to the wood. This step is optional but recommended. It is not recommended that you allow this coat of primer to dry fully before applying the final coat of paint. To provide a sturdy base for the stain and sealer, a high-build primer was applied to the top surface of each piece of wood using a paintbrush in this step.
Step 6) Apply Matte Clear Coat to the wood After the Primer has dried, it is time to apply a matte clear coat to give a glass-like finish. This finishing coat is applied with a foam roller, working from the bottom up.
Step 7) Apply Satin Clearcoat to the wood. Finally, a satin clear coat is applied to provide a lighter layer of protection from scratching.
Step 8) Apply the Sanding sealer and sand to Finish off the Product A sealer was applied to the entire table, followed by dry sanding. The result is a smooth texture and a beautiful natural look.
We hope the above tips are helpful in your floor restoration project. Hardwood will never go out of style. Hardwood is for you if you are looking for a classic, timeless flooring option. We are BEC FLooring, a flooring store in Alpharetta GA, we carry a wide selection of hardwood flooring to help you get the perfect look and feel for your home. Contact us for a complete transformation of your space if you think your previous flooring is beyond the point of reclamation or if the process of doing it yourself is too overwhelming.

